| Home | Rides | Reviews | Bikes | Gallery | Tech | Misc | Contact |
| How
to Change Your Motorcycle's Clutch
by Martin Hackworth Photos: Martin Hackworth and Alfonse Palamia |
|
|
|
|
Changing a clutch assembly on a motorcycle is one of the regular items of maintenance that anyone with a reasonably well-equipped workspace and tools can attempt themselves. Depending on the type of motorcycle you ride (and how you ride it) this can be a chore that needs to be done regularly. Racers (and hooligans), for instance, will go through a lot of clutches. With a little patience, a little prep and the proper tools most reasonably adept persons should be able to accomplish a clutch assembly replacement in about an hour. Clutch assemblies all come in minor variations on a common theme because they are all made to do the same thing - engage the motor smoothly to the transmission by varying friction between a series of discs or clutch plates. The complete clutch system consists of an actuation linkage (either hydraulic or cable driven) and a basket assembly (located in the engine case) consisting of a series of alternating fiber and steel plates pressed tightly together by a set of springs. One set of plates, (normally the steel ones) is connected to the transmission while the other set is connected to the engine via the crankshaft. The actuation system (clutch lever and linkage), when released, decompresses the clutch springs so that they press the clutch plates tightly together. The increasing friction, as the clutch level is released, allows the clutch to smoothly engage the engine and transmission. |
|
Clutch
plates are built to be robust. Under conditions of normal wear most
motorcycle
clutches
last a long time. Hard starts or anything that results in excessive
slippage will
cause the fiber plates to get thinner which lessens the
spring
pressure. Clutch cycling eventually weakens the springs and
this also
results in less spring pressure. The heat generated by frequent high
rev
engagements will scorch both the fiber and the steel plates
making them slip
more
easily. Under such conditions you are going to have to replace the
clutch
plates fairly often. As always the standard MoJazz proviso for all do-it-yourselfers applies: if you are are unable to exercise even a modicum of good judgment in following directions or are just plain dumber than a fence post you might want to consider going to your local shop and having this work done there. Changing a clutch is not without its associated hazards. For starters the bike could fall over on you. You shouldn’t drink motor oil no matter how much it looks like your favorite dark ale. Please exercise caution appropriate for the task and be sure to wear safety glasses at all times. |
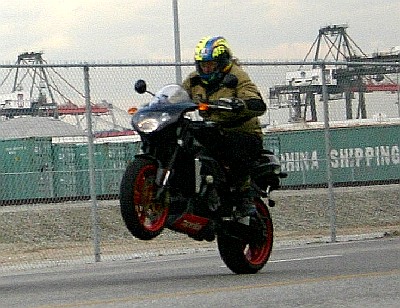 The
Tuono's
sturdy clutch is good for many wh..., er, miles.
|
|
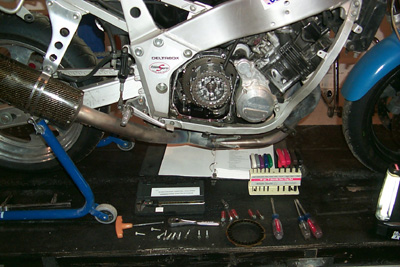
The instructions that follow apply specifically to replacement of wet clutch assemblies of the type found on virtually all modern Japanese motorcycles. A wet clutch is one that is bathed in engine oil when the engine is running. Owners of some Ducati’s, BMW’s, Harley’s and even a few Japanese bikes have dry clutch assemblies. These are, for the most part, even simpler to service as there are no fluids or gaskets to worry about. A bike lift is a really useful item for clutch work. I made mine out of concrete blocks and a 2 x 4 reinforced plywood deck that I coated with black stage paint impregnated with sand. The result is a non-slip surface that gives enough not to automatically damage things that you drop on it. A lift is nice because once you roll a bike up it gets everything high enough to be easy to see and reach. Lift or not just make sure that the bike is securely supported by either front and rear wheel stands, the center stand if the bike is so equipped, or the side stand if that’s all there is. Before beginning work I prep the replacement fiber plates by roughing up their surfaces on the concrete floor of my shop, cleaning them, and soaking them in engine oil for the length of time that it takes me to get everything ready for reassembly – typically around 45 minutes. Roughing up the new fiber plates insures that they will engage without excessive slip during break in. |
|
You’ll need a torque wrench, a set of sockets, a ratchet and extension, a large flat blade screwdriver, T-handle Allen keys, a micrometer and a gasket scraper. You’ll also need something to catch the oil that will drain out of the transmission when the clutch side cover is removed (from wet clutch assemblies). A shop manual for your bike is essential for torque specs or in case you fail to note the order and alignment of the various pieces of the clutch assembly on removal. You’ll also need a solvent to clean gasket mounting surfaces and some gasket sealer. Finally a Sharpie or grease pencil is invaluable in marking the alignment of various pieces for reassembly. Although you can get away with replacing only the fiber plates it's a good idea to replace the clutch springs at the same time. Replacement of the metal plates is necessary only if they show obvious wear. Complete clutch kits are available from Barnett, EBC, and other aftermarket vendors but I have always had great luck using OEM replacements. A complete clutch kit with both sets of plates, springs and a cover gasket should set you back around $150. |
 |
 |
Now to disassembly. First identify the clutch cover and loosen all of the clutch cover bolts in a crisscross pattern. Although you want to loosen the bolts in a crisscross pattern, make sure that you actually remove the bolts in either a clockwise or counter-clockwise pattern and keep careful track of which bolt came out of which hole. The bolts from the clutch cover on the Yamaha FZR400 we are using for this article were of several different lengths and getting them back into the proper holes is crucial. Mark the location of the first bolt removed with a Sharpie or grease pencil. A strip of gaffer’s tape works wonders in keeping the cover bolts in the proper order. On some bikes to remove the clutch cover you may have to remove other things such as the oil filter cover. Once that's done the clutch cover comes generally off with some very gentle prying from a flat blade screwdriver. Be sure to catch the oil that drains out of the engine casing when you remove the clutch cover. Take care to try and save the clutch cover gasket Set aside the clutch cover and gasket. |
|
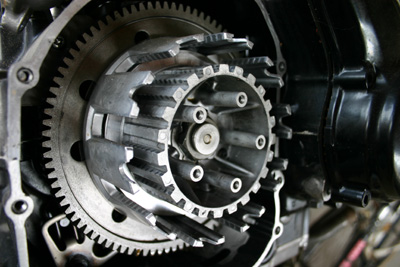
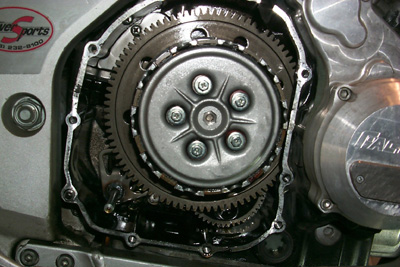
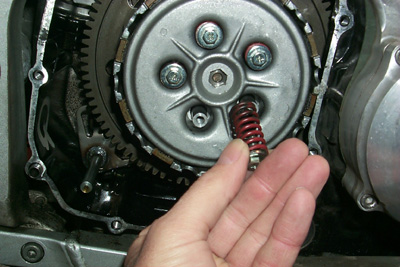
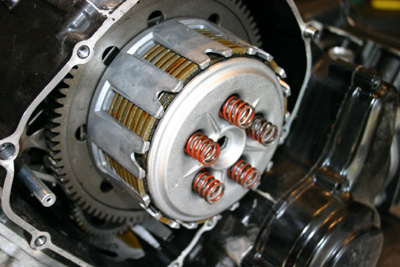
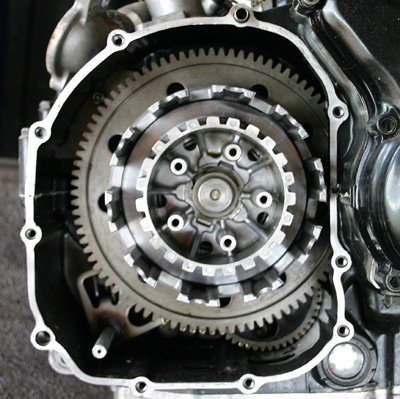
You are now looking at the clutch assembly consisting of the friction plates, a pressure plate, the clutch basket (the assembly that holds the clutch plates) and a throw-out bearing. The pressure plate is the outside plate. The clutch springs are held in place by the pressure plate bolts. Remove the pressure plate bolts and springs. Take note of any alignment marks on the pressure plate and clutch basket that may need to be matched on reassembly or make your own with a Sharpie. The springs and pressure plate should slide right out of the clutch basket. Once the pressure plate is removed you will expose the friction plates and throw-out bearing at the center of the clutch basket. The throw–out bearing pushes on the pressure plate to compress the clutch springs and allow the clutch to disengage. The throw-out bearing should stay put on most bikes but if it falls out make sure to note the location of any alignment marks and put it back in place. |
 |
|
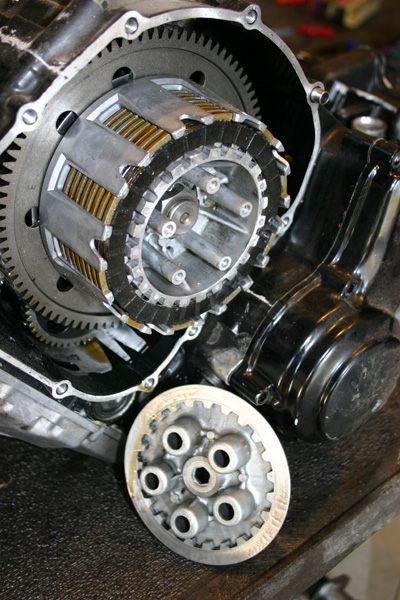
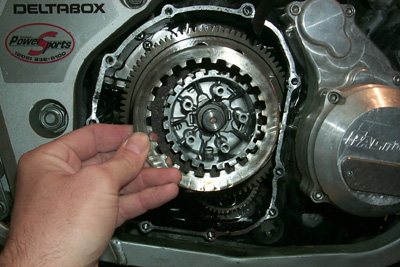
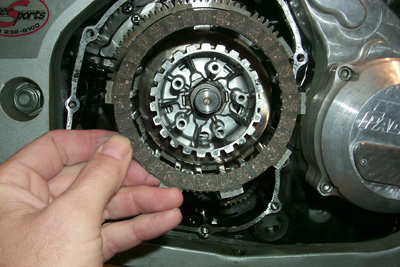
Next remove the clutch plates one at a time and stack them in exactly the same order as they came out of the engine. Note the alternating pattern of fiber and metal plates. Use the old plates as a template for installation of the replacement plates. Incorrectly stacked plates may cause the clutch to slip excessively and self-destruct long before its time. Years of bitter experience with mechanical devices from tricycles to particle accelerators has taught me that even the most lucid explanations of important mechanical protocols often fall upon deaf ears - at the worst possible times. So I will simply state that the importance of carefully ordering the various pieces of the clutch assembly as they are removed from the engine cannot possibly be overstated. Set the old clutch plate assembly down on a towel right beneath the engine in plain view. |
|
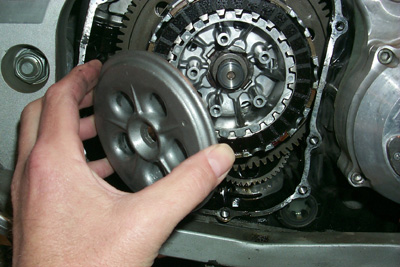
While the clutch is apart inspect the clutch basket's inner and outer hubs for wear. If any notches or grooves are visible in the fingers or splines of the clutch basket it probably needs to be replaced. In this relatively unlikely event consult the shop manual for your bike on how to proceed. Placing new clutch plates into a badly worn basket is an exercise in futility so don’t do it. In the normal course of events you won’t need to replace the metal plates in your clutch but be sure to check for signs of wear. You will want to look for discoloration or scoring due to excessive heat and friction. Mic the metal plates after visual inspection to make sure that they are within the specified thickness tolerances and check for warping on a set of machinists blocks. If any of the metal plates are scorched, warped, scored or show any other signs of distress replace the entire set. |
 |
|
|
|
|
By now the new fiber plates should be well soaked in oil and ready to be placed in the clutch basket. When sliding the new plates into the clutch basket be sure to assemble them in exactly the same order as in the old clutch pack which should be sitting helpfully in plain view. In the event that you are now cursing yourself for having not laid out the old clutch pack as recommended the innermost and outermost plates are usually fiber (though this is not always the case). Consult the shop manual to be sure. The metal plates are made from stamped steel and sometimes display a very slight asymmetry, i.e., the outside of each plate may have a slight flange resulting in a rounded side and a sharp side. Put the metal plates back in the same way that the old ones came out with one proviso – if the metal plates are asymmetric they should all face the same way. Which way doesn’t particularly matter as long as they are all the same. Replace the pressure plate over the new friction plates, bolt the springs onto the pressure plate and tighten the bolts in until snug. Be sure tighten the pressure plate bolts gradually in a crisscross pattern and use a torque wrench to insure that everything is tightened to the proper torque specs. Be sure to use a torque wrench and torque to the exact specs. |
 |
|
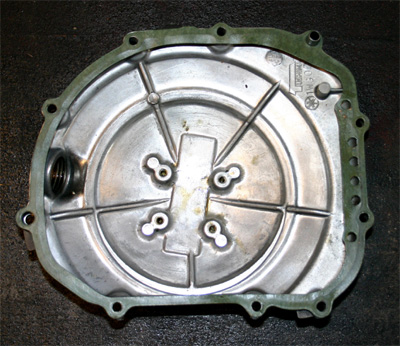
If you destroyed the old clutch cover gasket during disassembly be sure to gently clean off any remnants with a gasket scraper. Clean the gasket mounting surfaces on the engine and clutch cover with acetone or any commercial solvent that removes dirt and oil. Carb cleaner will work just fine in a pinch. The important thing is to make sure that the mounting surfaces are completely clean and free of any dirt or oil residue. This is harder to accomplish than you might think. Sometimes it helps to lean the bike slightly to make sure that the oil in the bottom of the clutch cavity isn’t running out the side over the surfaces you are trying to keep clean. Be very careful not to nick or score the mounting surfaces or you’ll be doing the fill and sand routine. |
|
When you have the mounting surfaces as clean as you can get them apply a thin coat of gasket sealant, let it cure for a couple of minutes until tacky, and place the new gasket in position. If you removed dowel pins from the engine case on disassembly replace them with the gasket. Replace the clutch cover and install the bolts in the proper holes to finger tightness. Once all the bolts are installed torque them to the factory specs in a crisscross pattern. |
 |
 |
Let the bike sit for an hour or so to allow the gasket sealant to set before starting the engine. Be sure to check the engine oil level before starting the bike and be sure to break in the new clutch gently. You may need to adjust your clutch lever to account for the new tolerances in the clutch assembly. Finally your new clutch will shed material that ends up in your engine oil. It's a good idea to change the oil and filter after a few hundred miles to remove any contaminants. If you follow the steps outlined above you should be able to change the clutch on most bikes without any undue difficulty. Take your time, eschew distractions and be organized. Assuming that you have successfully completed this MoJazz approved course on clutch replacement you are not ready for wheelies, burnouts, and other forms of clutch abuse. Do us all proud. May the force be with you. |
| Home | Rides | Reviews | Bikes | Gallery | Tech | Misc | Contact |